
Why AI Gets Interior Perspective Wrong, and How Drawing Fixes It
You know exactly which corner of the room you want to see. Forty prompts later, the walls still lean. This is a geometry problem, and you can't type your way out of it.
The picture in your head is very specific
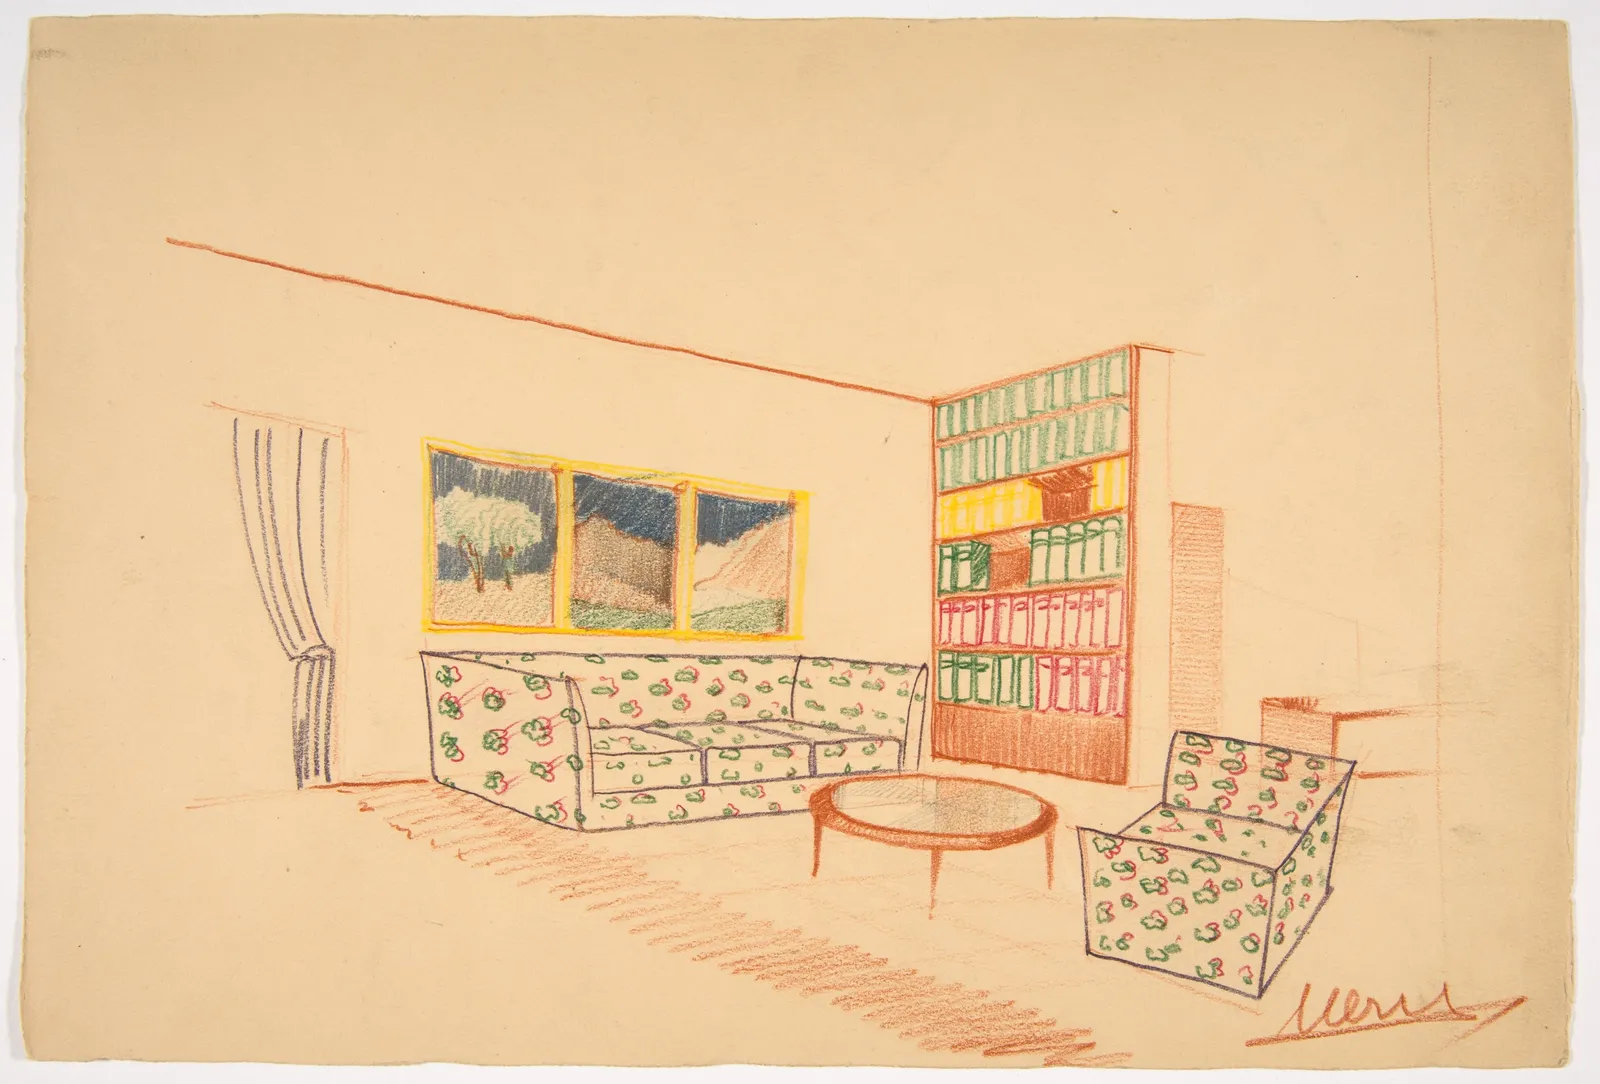
Look at the drawing at the top of this page. It's a living room by the Italian designer Guglielmo Ulrich, done in coloured pencil, and it now sits in the Metropolitan Museum of Art's collection (public domain, CC0). Nothing about it is precise. The sofa fabric is a few squiggles. But the room feels solid, because every edge on the floor, the sofa and the bookcase heads towards the same two vanishing points.
That's roughly what most people have in mind when they open an AI image generator to picture a room. They aren't after 'a nice living room'. They want their view: from the doorway, at eye level, sofa along the long wall, window on the left, bookcase in the corner. Style comes later. What matters first is where things are and where you're standing.
How the first hour usually goes
The first render looks great as a thumbnail. Then you open it full size and the corrections begin.
The window is on the wrong side, so you add 'window on the left'. It moves, and now the sofa faces the wall. You add 'eye level, one-point perspective, 24mm lens, straight verticals' because a forum post said so. The verticals get a bit better. The ceiling drops. A negative prompt for 'distorted, warped, fisheye' turns the living room into something closer to a corridor.
So you lock the seed and change one word at a time, which feels scientific but isn't, because one word is enough to move the whole camera. An hour later you've got a folder of nearly-right images, and you pick the one where the floor is least obviously wrong.
Why AI room renders come out warped
Image models don't build a room and then photograph it. There's no 3D box underneath. The model paints something that looks statistically like millions of interior photos, a patch at a time, and nothing in that process makes every line in the picture agree on one horizon.
You can usually spot it in a few places. Door frames lean a degree or two. The floorboards run towards a different point from the skirting. The rug tilts up like it's on a ramp, a side table is slightly too big for how far away it is, and the chair legs don't quite land on the floor. Each one is small. Together they're why an AI interior looks fine at a glance and more wrong the longer you look at it.
Words can't hold a perspective. Lines can.
Text is great for materials, colour and mood. It's terrible at geometry. 'Sofa on the left, about two metres from the window' describes dozens of valid pictures, and the model gives you a different one every time. There's no phrase that pins a horizon line to a particular height in the frame.
Architects and illustrators sorted this out a long time ago: set the eye level, put down the vanishing points, draw the box of the room, and only then think about finishes. Hand the AI those same lines and it stops guessing where the camera is. All it has left to do is decide what the surfaces look like, which is the part it's actually good at.
How CreateLevel keeps your perspective
We built CreateLevel around getting geometry into the model directly instead of describing it. Which way in makes sense depends on what you've got.
If the room exists, take a photo of it. The camera, the horizon and the walls are now fixed, and every restyle or edit keeps that exact view. If the room doesn't exist yet, draw it on the canvas with the brush or the straight-line tool, or upload a sketch from paper or SketchUp, and the render follows your lines. And if you've got a photo but want to add something to it, draw the new piece in the photo's own perspective and mask around it, so only that patch gets generated.
Example: adding a chair that actually sits in the room
That last case is where prompts struggle most. The brief here was simple: a lounge chair next to the sideboard. Type 'add an armchair next to the cabinet' and you'll often get a chair that's a size too big, angled towards some other vanishing point, or perched on the edge of the rug.
So we drew it instead. A few white lines on the draw layer, legs on the floor, seat roughly level with the top of the sideboard, then a soft mask brushed around it. The prompt only said what sort of chair it should be.
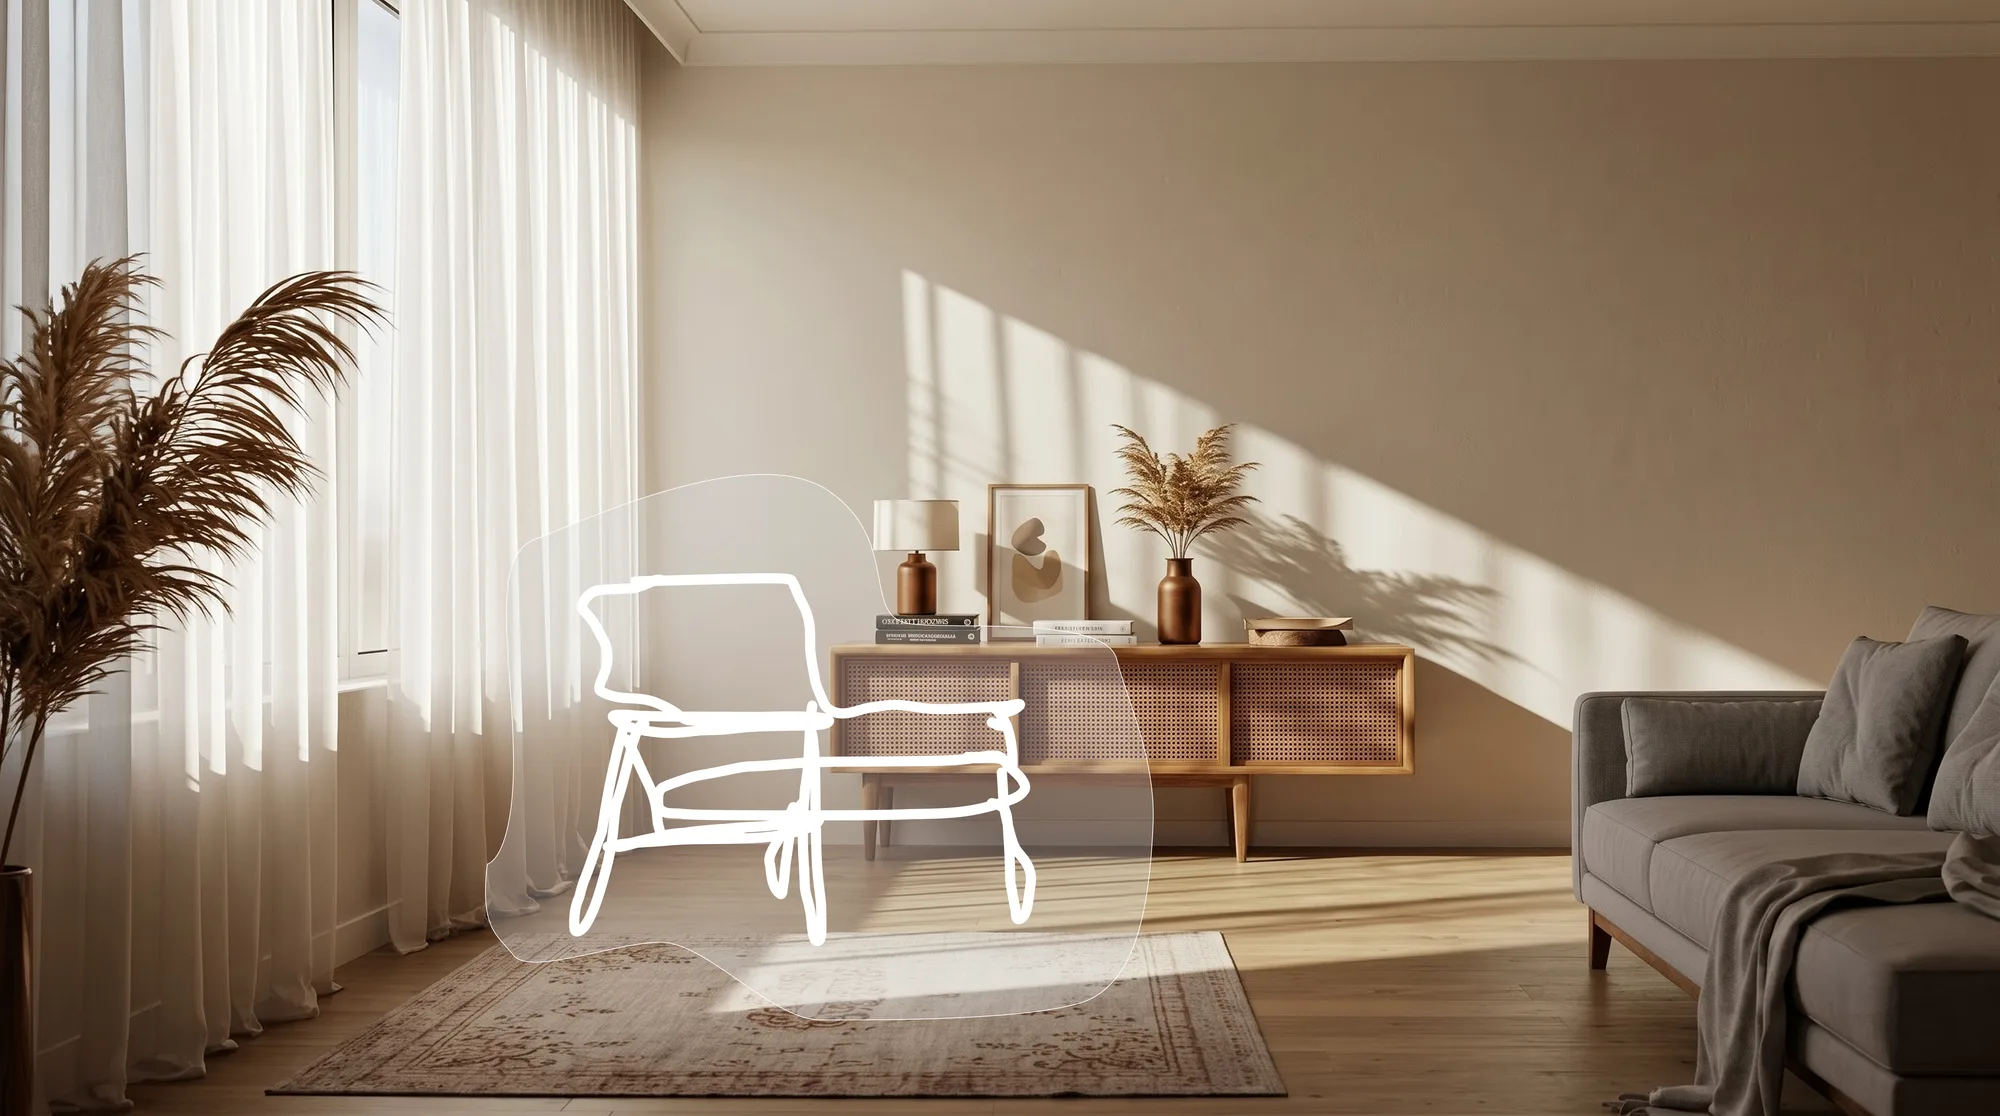
Same room, same camera, one new chair
The chair comes back sitting on the floor, at the right size for where it is, and its edges follow the room's perspective because they follow the lines we drew. The curtains, the sideboard, the sofa and that patch of sunlight on the wall haven't moved at all. They were outside the mask, so they weren't touched.
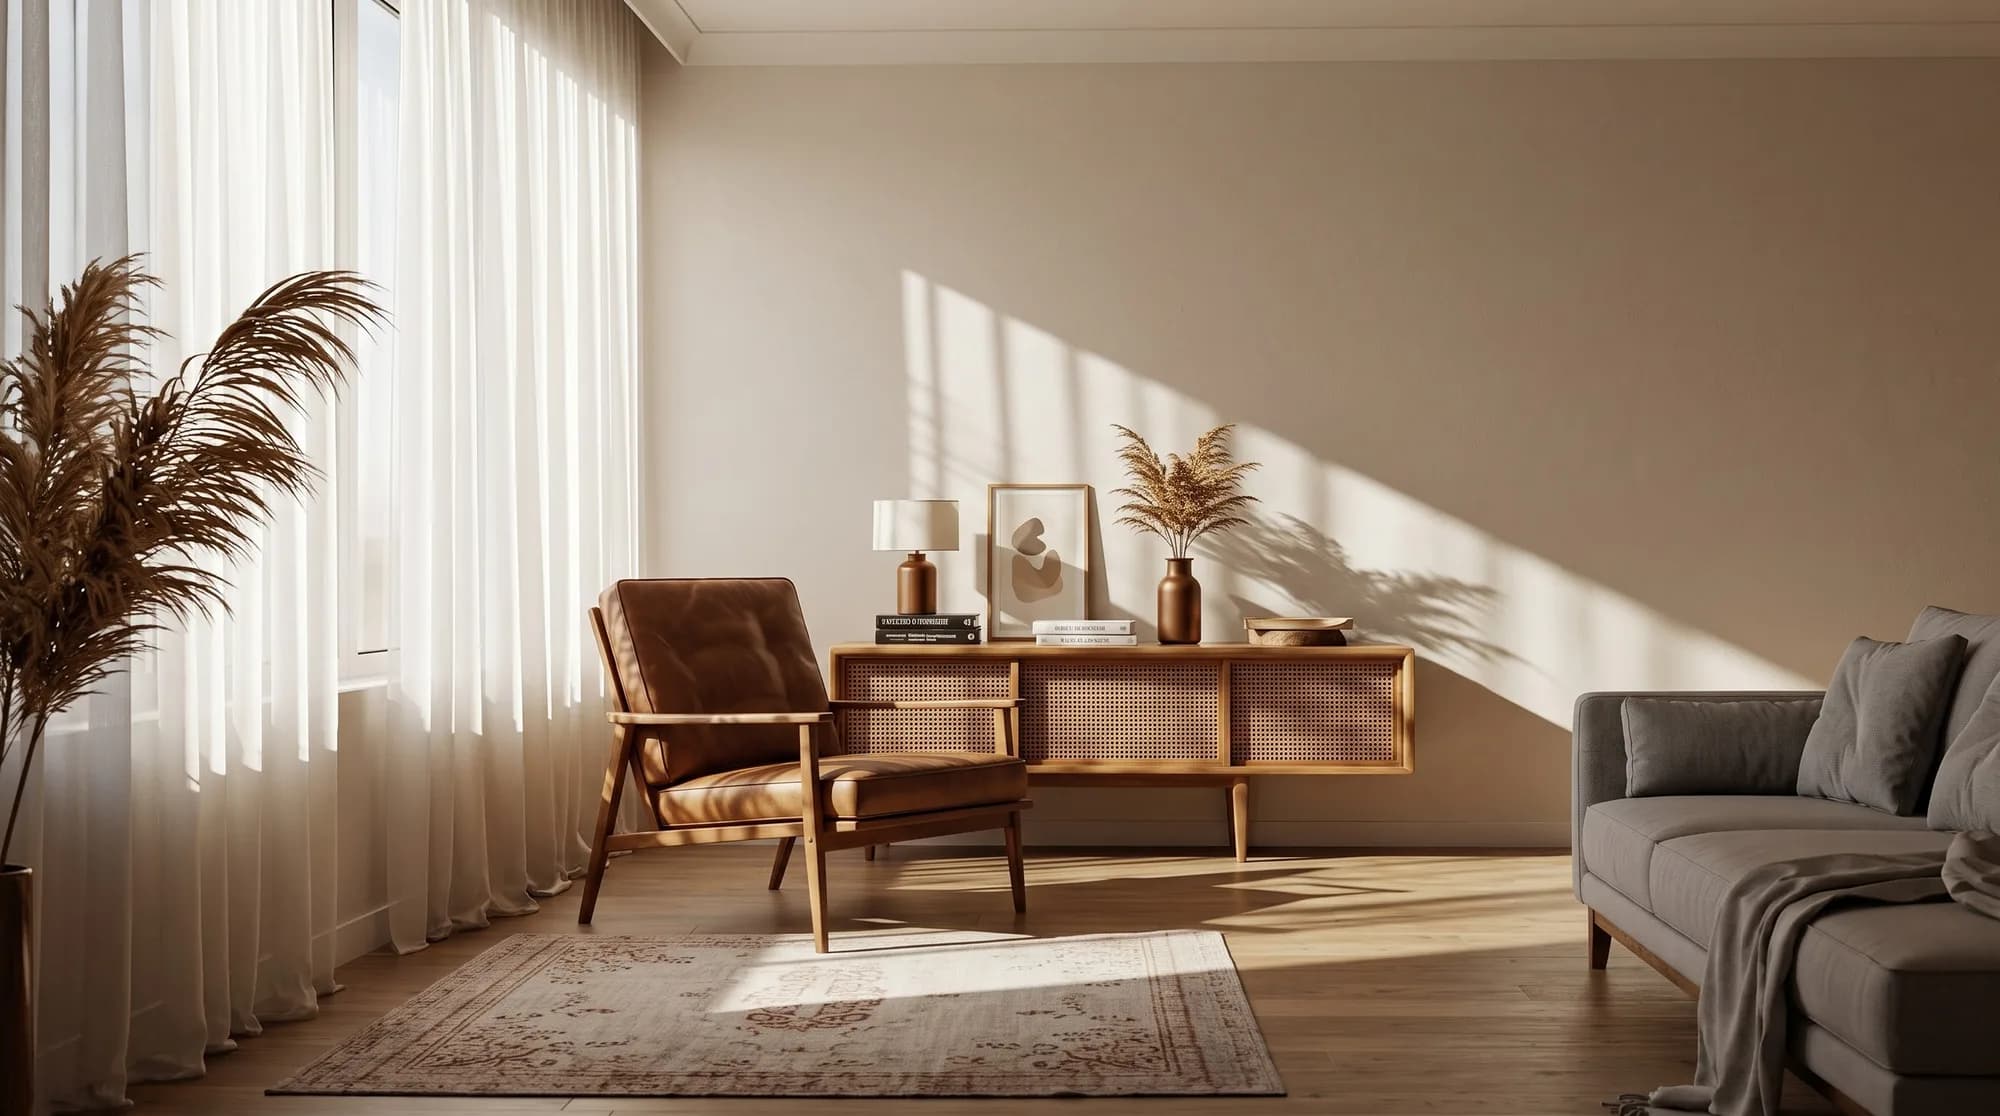
Sketching a perspective the AI can read
You don't need to draw well. You need the lines to agree with each other. A one-point view from the doorway is the easiest to get right, and it works for most rooms.
- Draw a horizon line at standing eye height. For a normal view that's about a third of the way up the frame.
- Pick one vanishing point on that line, somewhere near the middle.
- Draw the back wall as a plain rectangle, then run lines from its four corners out to the edges of the frame, as if they're coming from the vanishing point. That's your floor, ceiling and side walls.
- Use the straight-line tool for these. Shaky perspective lines turn into shaky walls.
- Block in furniture as boxes, with their depth edges also pointing at the vanishing point.
- Mark windows and doors clearly. They tell the model how big everything else is.
- Skip the shading. The model reads pencil tone as real shadow and will happily paint it in.
What to type once the lines are down
Once the drawing handles the geometry, the prompt gets much shorter. Something like 'pale oak floor, warm white plaster walls, linen sofa, late afternoon light from the left' is plenty.
Drop the camera words. 'Wide angle', 'one-point perspective' and lens lengths were a workaround for not having a drawing, and now they'll fight it. If there's a material or a mood you can't put into words, add a reference image rather than piling on adjectives.
Where this stops being useful
A render from a sketch is a concept image. It'll get the view and the look right, but it has no idea about real dimensions, clearances or what a finish costs once it's installed. Use it to agree on a direction with whoever you're working with, whether that's a partner, a client or a builder, and then move on to measured drawings.
Watch the demo
Frequently asked questions
- Why does AI distort the perspective of my room?
- Because there's no 3D room behind the picture. The model paints something that looks like interior photos, and nothing forces the walls, floor and furniture to share one horizon. Giving it a photo or a perspective sketch supplies the geometry it's missing.
- Can I fix perspective by adding 'one-point perspective' to the prompt?
- It nudges things a little, but it won't hold. Camera words change the general feel of the image. They can't place a horizon or a vanishing point. A handful of straight lines on the canvas does far more.
- Can AI turn my interior perspective sketch into a realistic render?
- Yes. In CreateLevel you can draw straight on the canvas or upload a hand sketch or a CAD line export, and the render follows your linework. The perspective you drew is the perspective you get back.
- How do I add furniture to a room photo in the right perspective?
- Draw a rough outline of the piece where it should stand, with its edges following the room's lines. Brush a mask around it and describe the piece in the prompt. Only the masked area is generated, so the new item takes its angle and size from your drawing.
- Do I need to know perspective drawing?
- Not really. A horizon line, one vanishing point and a few straight lines from the corners will do for most rooms. And if you've got a photo of the room, you don't have to draw the room at all.
- Is it free to try?
- Yes. The free tier gives you 5 generations with no credit card, which is enough to try a sketch and an edit on your own room.
Try it on your own room
Every style unlocked, interior and exterior both included. Plans from $7.
Keep reading
Sketch to Image AI: Scribble, Draw, Render
Sketch to image AI for rooms and buildings: draw a rough scribble and get a photorealistic render back. CreateLevel reads your linework (edges, openings and depth) and keeps your composition.
Change One Thing in a Room Photo With AI, Without Losing the Rest
You asked for a different sofa and got a different room. Masking is how you tell the AI which bit is up for change and which bits it has to leave alone.
Interior AI With a Drawing Feature: Sketch, Brush and Redesign Any Room
Most interior AI tools only let you type and hope. With a drawing feature you show the model where things go, and it only touches what you drew.
Scribble to Design: AI Image Generation From a Room Sketch (2026 Guide)
Scribble a room, get a photoreal render back. How scribble-to-image AI reads your sketch, how to draw furniture placement onto a real room photo, and which 2026 tools can do it.
AI Interior & Room Design From a Single Photo
Free AI interior design from one photo: upload a room and get a photorealistic redesign in seconds. 50+ styles, mask-level editing, no credit card.